
How to Turn a ChatGPT Image into a Minecraft Skin PNG
Turn your ChatGPT character image into a Minecraft skin. Refine the front and back, generate a 64×64 PNG, and check it before playing.
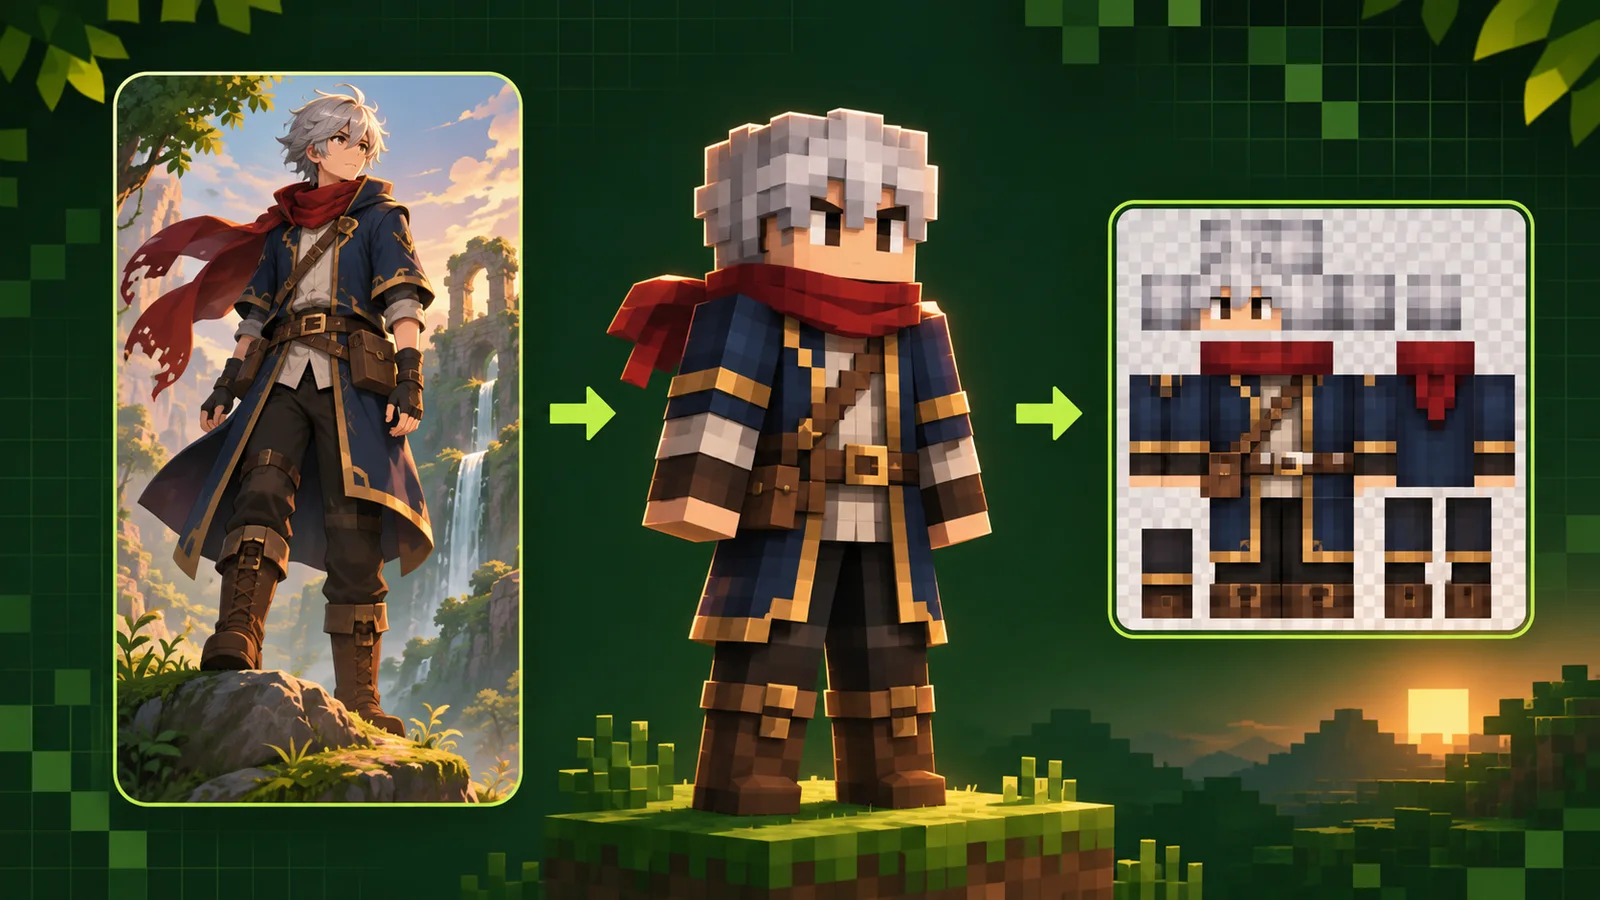
To turn a ChatGPT character image into a Minecraft skin, upload it to Photo to Skin, describe the features you want to keep, review the front and back, and generate the skin PNG. The useful starting point is the character you already like: its hair, outfit, colors, and personality.
A picture can look convincing and still need work before it becomes a wearable skin. This guide follows the AI creation route, with appearance prompts you can adapt to your own image.
The cover is an AI-generated concept illustration. It does not show a tested conversion or an importable skin texture.
First, check whether you already have a skin texture
Look at the file ChatGPT produced. Does it show a standing character, portrait, or scene? That is a reference image. If it shows separate rectangles for the head, torso, arms, and legs, it may already be a skin texture and should be checked on the matching player model.
Minecraft’s official skin guide explains that importing requires an unfolded PNG texture. A .png extension alone does not establish that its pixels follow the required layout.
If your download is character artwork, keep it at its original quality for the next steps. Shrinking a portrait to 64×64 does not rearrange its face and clothing onto the different body surfaces. For file-specific problems, see our photo and skin import guide.
Step 1: Upload the character image you want to use
Choose Photo to skin in the generator. Upload one character image and sign in when prompted. The current upload interface accepts JPG, PNG, or WebP files up to 10 MB.
Choose a reference that makes your priorities visible. A portrait can establish a face and hairstyle, while a view that includes the outfit gives you more clothing detail to work from. If the image cuts off the legs, decide what the trousers and shoes should look like before generating.
Use character artwork you own or have permission to use.
Write down three features that make the character recognizable. For example: silver hair, a red scarf, and a navy coat. Treat those as the essentials. A tiny buckle or embroidered pattern can be a lower priority when translating the design into pixels.
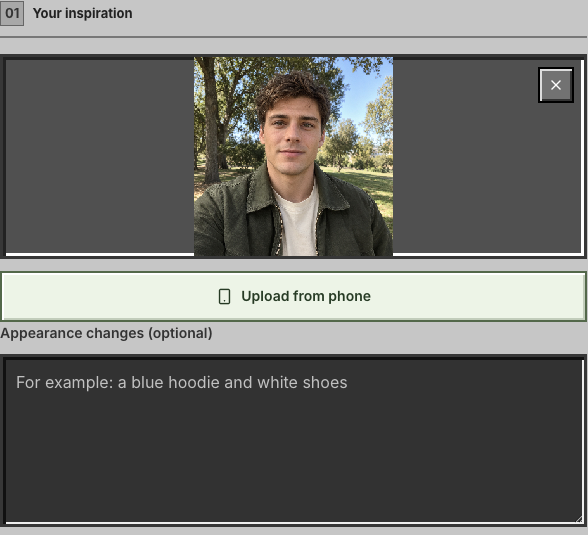
Existing upload-interface screenshot from our photo-import guide. It demonstrates where a reference goes; it is not a ChatGPT conversion test.
Step 2: Add appearance instructions that give the AI clear choices
Use the Appearance changes field to describe what matters. Start with the features to keep, then specify changes and any details missing from the reference.
Adapt these starter prompts to your character. Replace the colors, clothing, and accessories with your own character’s details.
Prompt A Keep the original character’s main features
Keep the character’s silver hair, red scarf, navy coat, and brown boots. Preserve the main clothing colors and the recognizable hairstyle. Make the back of the coat plain navy, with the scarf continuing around the neck. Leave out the background and floating sword. Keep the design readable at Minecraft skin scale.
Use this when you like the original outfit. The instruction about the back supplies a preference that a front-facing picture cannot show.
Prompt B Keep the face and hair, change the outfit
Keep the character’s dark curly hair, warm brown skin, and green eyes. Replace the armor with an orange hoodie, dark blue trousers, and white shoes. Put a small white stripe on each sleeve. Make the back of the hoodie orange. Remove the helmet and shoulder spikes.
This gives the model a clear boundary between identity features and clothing changes. Adapt the whole description so it represents one consistent outfit.
Prompt C Simplify a detailed fantasy design
Keep the purple hair, gold eyes, and dark green outfit. Simplify the layered armor into broad green sections with a few gold accents. Replace the tiny chest emblem with a simple gold diamond. Keep the boots dark brown. Show the same outfit colors on the front and back, with no extra weapons or scenery.
A useful simplification preserves the character’s strongest visual cues. Decide which detail deserves the available space instead of requesting equal emphasis on every ornament.
Step 3: Review the front and back, then refine the description
Generate the character preview. Photo to Skin lets you revise the appearance instructions and request another preview before committing to the skin conversion.
Compare the result with your three essential features. Then check the less obvious decisions: the back of the hair, the rear of the coat, the shoes, and whether an accessory continues around the body in a sensible way.
Make a short decision for each essential feature: keep it, revise it, or accept a simpler version. You might keep the hair unchanged, ask for a longer coat, and accept a single gold shape in place of a detailed brooch. This keeps your next instruction focused on the changes that matter to you.
When something is wrong, name the change precisely. “Make it closer to my picture” leaves the priority unclear. “Keep the coat navy and change only the scarf from orange to red” tells the model what you want preserved as well as what needs revision. Update that part of your full description while keeping the other essential features in place. Review the next result for unintended changes, too.
The current credit information lists 1 credit per preview and 2 additional credits for the confirmed skin conversion. Check the displayed cost before each generation.
Step 4: Generate the skin PNG and check the result
When you are happy with the chosen preview, confirm the skin conversion. Photo to Skin creates a 64×64 PNG, which you can inspect in its 3D preview and download.
Review the actual skin with the same priorities you used earlier. A design can retain the right colors while losing an important facial detail. Conversely, a simplified scarf may still make the character immediately recognizable.
Turn the character around and check:
- The eyes, hairline, and sides of the head.
- The front and back of the outfit.
- Sleeves, trouser legs, and the edges of the shoes.
- Any feature that was important enough to mention in your prompt.
Judge the result at a normal viewing size as well as close up. Save the original reference and the final downloaded texture separately so you can compare them later.
Step 5: Import the downloaded texture into Minecraft
Use the downloaded skin file when importing. A screenshot of the 3D preview serves a different purpose and cannot substitute for that texture.
For Java Edition, the official instructions describe opening the Launcher’s Skins tab, adding a new skin, and choosing the model that matches the PNG. Classic uses four-pixel-wide arms; Slim uses three. Check the arms and sleeves after importing, especially if you change the selected model.
For Bedrock, check whether your device supports custom skin imports before planning to use the file there. The available route varies by platform. Keep a local copy of the PNG even after you equip it.
Frequently asked questions
Can ChatGPT make a Minecraft skin I can use directly?
Check the actual output. If it is a correctly arranged skin texture that works on the intended model, you may already have what you need. If it is a character illustration, use it as the reference for the workflow above.
How do I make a ChatGPT Minecraft image into an actual PNG?
Use your character image as the reference, complete the preview and conversion steps, and download the resulting skin texture. Saving the original artwork in a different format does not perform that conversion.
Will the skin look exactly like my reference?
Expect interpretation and simplification. Details outside the picture must be supplied through your instructions or inferred during generation. Prioritize the features you care about, compare both views, and check the final skin before using it.
Give your character a place in Minecraft
Start with your character image and a short description of what to keep. Choose the appearance you like before generating the downloadable skin.
If the finished result only needs a small color correction or a few pixel changes, use the free skin editor for that final touch-up.
Working from a game avatar instead? Follow the Roblox avatar screenshot guide. To borrow an outfit from another design, see how to combine two Minecraft skins with AI.